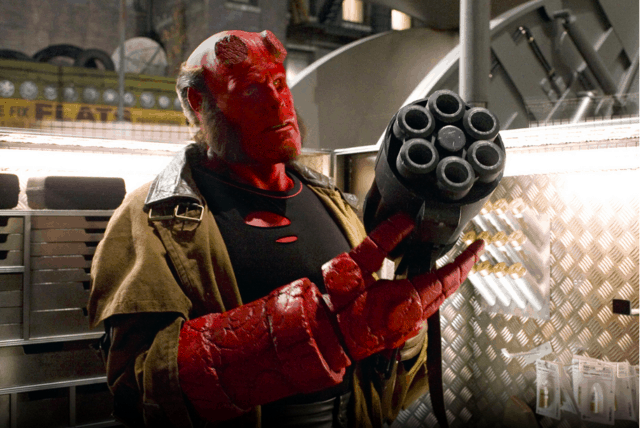
If you are looking for the perfect scary conversation piece prop for that special Halloween party, look no further. If you get started soon you too can have a homemade replica of Hellboy’s right hand! And we’re not talking about a Hellboy glove either–that you can find online. This is a fully functioning puppet hand!
Luckily, a fabulous genius production designer, Odin Abbott has laid out the plans for us so all we have to do is follow directions. This video appears at the bottom of this post.
First, he freehands the foam pieces and then cuts them to fit after. He actually makes a ruler out of a piece of foam, which is easier than it sounds if you follow Odin’s instructions. He then uses the foam ruler to measure his hand, which is important to make a puppet that fits like a glove.
He then cuts two foam cylinders. One that fits around his hand and another larger one to fit around his wrist. He reinforces the inside so that it can hold the moving finger mechanism. The fingers are made from polyethylene tubing cut into 9-inch pieces. He cuts notches in the tubes for knuckles. Pay attention to this part as he has a technique for cutting the notches so they don’t tear through the tubing. Then he fits in pieces of wire coat hanger. Nylon string is employed as tendons.
After wiring the fingers (which seems to be the trickiest part). he anchors the finger tubes inside the cylinder. He ties off each string to a metal ring with super glue so he can easily manipulate them. Odin then reinforces the area for the thumb.
For the skin, he uses something called “open cell poly foam” so that it looks and feels softer, like real Hellboy skin. Pay close attention to the foam cutting procedure where he glues foam backs to the fingers and then to the hand. He uses foam to pad it. He cautions that if you use a glue gun for polyfoam wear protective clothing. He uses a saw to cut circles.
More rings of foam are constructed around the arm for arm and wrist joint connections. He draws the iconic mark designs carefully. He then sands off the sharpie marks and uses grinding stone bits to rough the surface up a bit. Instead of merely painting the foam he coats it two to three times with latex rubber.
Odin next mixes the blood red paint with adhesive to make a flexible paint glue that will stick to the adhesive. He uses a brush and stipple technique to get good coverage and applied several coats. Cover the finish with baby powder to prevent sticking. Then apply more reddish brown paint for the crevices to look like dried blood then add more red acrylic. He then demonstrates that you just have to pull the inner rings to move them and then when you let go they will straighten out.
So thanks to Odin Abbott just about any adult can make this “Hellboy Right Hand of Doom” with little work or expense. It does take a little time so better get started now. Halloween is coming!
 Follow Us


